K O logo
IoT

IoT — Building an automated greenhouse Pt. II

Author

Kalle

Date Published

This AI-generated image shows a high-tech greenhouse filled with rows of plants. The space is equipped with advanced sensors, digital displays, and automated systems for monitoring plant growth, powered by Raspberry Pi.

In the last session we connected a soil moisture sensor to the cloud and can collect its data now. But these values are not very useful without any reference value to tell it stands for dry or wet soil. Because this reference value depends on the type of soil you are using (mineral content, density,...) and the actual sensor, this value should not be hard coded and easy to change. That's why today we will add an interface to configure the reference value of dry soil. In the next and last session we will add a firebase function to trigger an action to tell you that you have to water the plants again.

As soon as you write data to a database with a form over the internet you should protect your database by authentication. With firebase you can do this by editing the rules to access the firestore. Instead of just setting it to false, like the last time for write access, you can can check if request.auth.uid is not equal null so the request comes from any authenticated user. If you want to limit access to only one specific account you can also check for one specific user id.

1service cloud.firestore {
2 match /databases/{database}/documents {
3 match /{document=**} {
4 allow write: if request.auth.uid != null;
5 allow read: if request.auth.uid != null;
6 }
7 }
8}

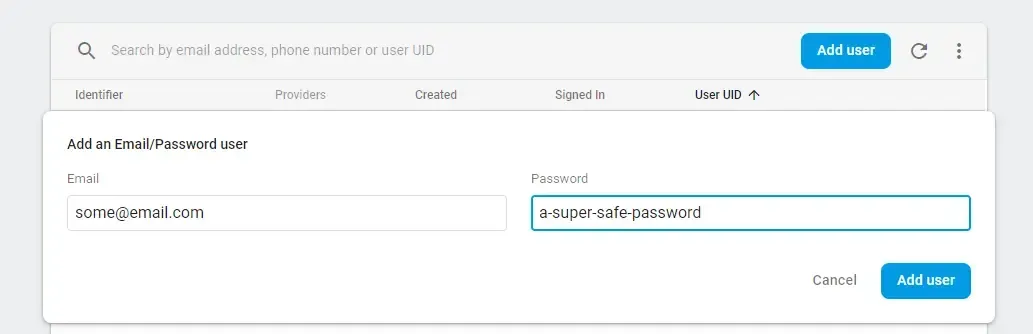
Now you have to implement an authentication mechanism in the web app, which is fortunately done at the largest part by the firebaseui-web package and with react you can use firebaseui-web-react. To use this there is a prerequisite, you have to enable an authentication mechanism

The image shows a section of an "Authentication" settings page, specifically under the "Sign-in method" tab. The "Email/Password" sign-in provider is enabled, allowing users to sign up using their email and password. There's also an option to enable "Email link (passwordless sign-in)," which is currently disabled. The page has "Cancel" and "Save" buttons at the bottom right.

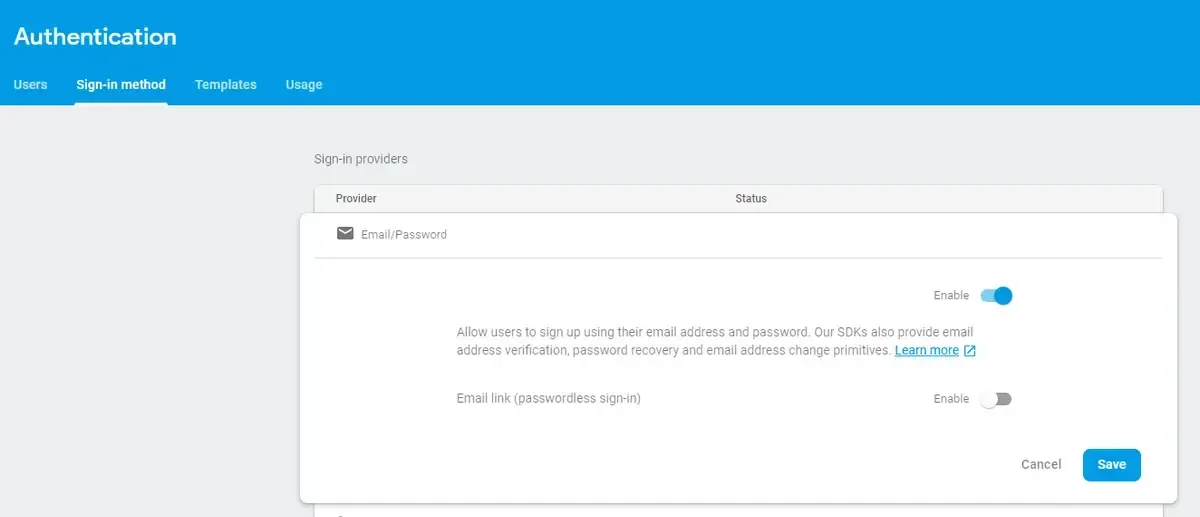
and create an account.

The image shows a user interface for adding an Email/Password user. The form has two fields: "Email" with the value "some@email.com" and "Password" with the value "a-super-safe-password." There are two buttons at the bottom: "Cancel" and "Add user." The "Add user" button is highlighted in blue.

To get the actual authentication capabilities in the web app you have to add the firebase/auth package to the other firebase imports:

1import firebase from "firebase/app";
2import "firebase/firestore";
3import "firebase/auth";

With the auth package you can get the authentication state by subscribing to with the onAuthStateChanged function:

1...
2 componentDidMount() {
3 this.unsubscribe = firebase.auth().onAuthStateChanged(
4 user => {
5 this.setState({ user })
6 }
7 )
8 }
9...

In the render method of the App component you now can render conditionally the sign in view or the actual app content:

1import firebase from 'firebase/app'
2import 'firebase/firestore'
3import 'firebase/auth'
4import FirebaseAuth from 'react-firebaseui/StyledFirebaseAuth'
5...
6...
7 render() {
8 return (
9 <div>
10 <header>
11 <h1>My Greenhouse</h1>
12 </header>
13 {this.state.user ? (
14 <AppContent />
15 ) : (
16 <FirebaseAuth
17 uiConfig={{
18 signInOptions: [firebase.auth.EmailAuthProvider.PROVIDER_ID]
19 }}
20 firebaseAuth={firebase.auth()}
21 />
22 )}
23 </div>
24 )
25 }
26...

With the authentication done, the next step is to actually set the reference value that will be used to determine if the soil is dry or wet. To safe a value with the key dryReference in the collection settings on the document soilData you can use the following snippet:

1const updateDryReference = (firestore) =>
2 // debounce the actual update function to save database writes
3 debounce((dryReference) => {
4 firestore.collection("settings").doc("soilData").set({ dryReference });
5 }, 250);

According to updating a value you can of course again subscribe to the changes:

1const subscribeToReferenceValue = (firestore, onUpdate) => {
2 return firestore
3 .collection("settings") // choose the collection of your data
4 .doc("soilData") // choose the document
5 .onSnapshot((documentSnapshot) => {
6 if (documentSnapshot.exists) {
7 // read the actual data and give it to the onUpdate function
8 onUpdate(documentSnapshot.data().dryReference);
9 }
10 });
11};

With the Slider component from the @material-ui/lab/Slider package you can create a slider UI to change the value stored in the firestore

1...
2 render() {
3 return (
4 <div className="dry-reference-form">
5 <p>Dry Reference: {this.state.dryReference.toFixed(2)}</p>
6 <Slider
7 min={0}
8 max={1}
9 step={0.05}
10 value={this.state.dryReference}
11 onChange={(_, dryReference) => {
12 this.setState({ dryReference },
13 // after setting the local state send
14 // the new value to the remote data store
15 () => {
16 this.updateRemoteDryReference(dryReference)
17 })
18 }}
19 />
20 </div>
21 )
22 }
23...

Tasks

  • protect the firestore data access to authenticated users only, or your account
  • extend the data visualization app with authentication
  • implement a component to control the dryReferenceValue

For a sample implementation you can look at: github.com/kaoDev/kalleott.de/tree/master/samples/greenhouse

This AI-generated image depicts a vast, futuristic greenhouse with multiple rows of plants. The facility is equipped with advanced monitoring systems, large digital displays, and automated equipment for optimizing plant growth.

IoT — Building an automated greenhouse Pt. III

Complete the automated greenhouse project by integrating Google Cloud Functions to send notifications when soil moisture levels drop. This guide covers setting up cloud functions, modifying device code, and ensuring the system runs smoothly with Firebase, ultimately providing a robust solution for maintaining your greenhouse.

Mailing List

If you want to receive updates on new posts, leave your email below.